Don't you love the looks of these "rocks" that are actually chocolate chips??? Keep reading, $25 worth of cooking ingredients (like these "rocks" or dried fruit or nuts or gift baskets) could be yours!
Is it too early???
Tough, I love this month... MERRY CHRISTMAS!
Jackie and I (famous on the blogworld for being empty nesters) were thrilled to have our favorite Niece and her family visit for Thanksgiving. Guided by the grand nieces and nephew (ages 4,6 and 7), we went to tree lighting ceremonies, sat on Santa's lap (Santa even remembered that one of the nieces cried on his lap when she was 2... you should have seen the look on her face), ate at three kid friendly restaurants (had our hamburgers delivered on a model railroad car), saw live theater (Junie B Jones in Jingle Bells, Batman Smells), saw Disney's new movie, Tangled in 3-D and had hot chocolate and S'Mores around our firepit in our snuggies.
I highly recommend having a few pre-teens around the house for the holidays.
Long time readers also know that I am an early riser. I like to get up and watch the sun come up, take a walk and sort my head around my plans for the day (that sounds so much better than I get up because I have to pee and I can never get back to sleep. I'm old, and you all will be there sooner than you think.).
Well, yesterday, instead of a walk, I got up and made the kids cookies. They have an 8 hour drive back to South Dakota (truly God's country). I found out this week that my grand nieces (the 6 and 7 year olds) have a favorite color. One likes pink and one likes green. Perfect for those Christmas colored M&M's.
My grand nephew, age 4 is... well, he is the MOST "4 year old" you have ever met. His parents must be exhausted all day long. But he is at that perfect age to threaten with the rocks from Santa line. It's kind of amazing how often that line was used this weekend. Like I said, he's 4.
So, with a little food coloring, a bag of M&M's and a bag of these "rock" chocolate chips (and a simple butter cookie recipe), it is a simple matter to have an individual gift ready for their drive home.
2 1/2 cups (375g) unbleached all-purpose flour
1/2 teaspoon baking powder
3/4 teaspoon salt
2 sticks (16 tablespoons or 220g) unsalted, room temperature butter
1 3/4 cups (380g) sugar
2 eggs
1 tablespoon pure vanilla
1 small package (2 ounces or 55g) M&M candies
1. Preheat the oven to 375 degrees (190 degrees Celsius).
2. Whisk the flour, salt, and baking powder in a medium bowl. Set aside.
3. With an electric mixer fitted with the paddle attachment, cream the butter on high until smooth and light, about 2 minutes. Next add the sugar and continue beating until light in color and fluffy. With the speed on low, add eggs one at a time, followed by the vanilla. Beat until smooth.
4. Turn off the mixer and scrape down sides of bowl. Turn the mixer to low and slowly add the dry ingredients. Mix until just incorporated.
6. Scoop out dough by 2 tablespoonfuls and place about 2 inches apart on a baking sheet. Press 5-8 M&M’s on each ball of dough. Flatten each ball of dough slightly with the bottom of a glass. Bake for 12-15 minutes, or until barely golden brown on the edges.
7. Remove from oven and let rest on the baking sheet for about 5 minutes before transferring to a cooling rack.
Pretty obvious the changes I made, mix and match the colors with some food coloring. Substitute the "rock" chocolate chips for M&M's for the 4 year old's cookies. One note is to bake for just 12 minutes. These are wonderfully buttery soft with a crisp bottom when slightly under baked, but are almost rock hard if you let them get too done.
Amid all the hugs and wet sloppy kisses good-bye, I gave each of the kids a bag with their favorites; told them each I made them special just for them because they were my favorite and I wanted to make their favorite colors.
I am not above buying affection with cookies!
And what great timing...
Just last night, the Christmas angels were smiling down on me. I got an email from the "nut" elf at OHNUTS!
Oh Nuts is a wonderful company. Specializing in mail order ingredients you may not be able to get locally (dried Papya, Figs, Mangoes and Blueberries for an example).
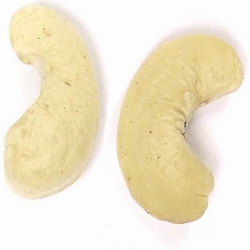
I am a HUGE fan of the "raw" cashews you can buy in bulk. If all you have had is the oil coated, over salted cashew, you really haven't tasted the true taste of a cashew.
They also have ready made gift baskets (like these chocolate covered pretzels in a dark chocolate basket), perfect to let your fingers do your Christmas shopping for you.
And of course, I always order a pound or two of the Chocolate Rocks. Soft, candy coated and a fun way to make chocolate chip cookies a little different... Or how about making Rocky Road Brownies really look... Rocky!
So, here's the deal, one lucky winner will get a $25 virtual gift certificate straight from the nut elf at Oh Nuts! They ship daily, so you will be able to get an order in and received before Christmas! Here's their rules...
Please offer your readers (you guys) 3 ways to enter
1. Your reader should go to the Oh Nuts Christmas gift basketspage (click the Blue Letters to go to that page... but you knew that). They have to choose their favorite Christmas Gift and leave a comment on your blog post with the name and url of the gift they like the most.
OR
Your reader should go to the Oh Nuts Hanukkah gifts page. They have to choose their favorite Hanukkah Gift and leave a comment on your blog post with the name and url of the gift they like the most.
You (I) will pick a random winner and we will email the winner a $25 gift certificate.
2. Your readers can go to the Oh Nuts facebook page and post on the wall the url and name of their favorite Hanukkah Gift OR Christmas Gift. They should also write "I am here via "Your blog"
3. You readers need to follow @ohnuts and should Tweet
" Win a free Hanukkah Gift from http://bit.ly/6nIsCi Follow @ohnuts & Retweet to enter. "
OR
" Win a free Christmas Gift from http://bit.ly/dUpizt Follow @ohnuts & Retweet to enter. "
Also, I want to add a category. I used to think that followers were fun and inspiring,, but ultimately, not really important. In fact, they are a measurement that some companies use to measure the popularity of your blog. I am starting to enter more contests, and number of followers is one of the many factors that is weighed when winners are considered. So, if you are following me now, send me a comment that you already are (thanks). If you are not a follower, become one now and leave me that comment (look at all those happy faces at the top of this column, that's where you sign up to follow).
SO, 4 ways to enter. Please leave me a separate comment for each way you qualify to win! contest is open until Tuesday, December 7th at midnight. Winner will be announced next day and you can turn in your order the same day for all you Christmas baking needs!
Good luck, I hope you all win (but only one will from me)
A beautiful deep burgundy hue formed around my bird this year. Slow roasted (250 degrees in a roasting pan) to an internal temperature of 170 degrees, the bird looked wonderful!
But the brining insured a moist juicy bird. In my opinion, brining your bird is probably the single most important thing a home cook can do to get a consistent restaurant quality turkey. It's not to early to plan for Christmas.
Be honest, was your bird just a bit too dry this year?
Here's what I did to mine...
juice from 3 Pomegranates (About 4 cups) 1 gallons water 1 gallon worth of ice 1 1/2 cups kosher Salt 15 black peppercorns cracked 6 bay leaves 1/2 cup"Not Your Grandmothers Herbes de Provence" Mediterranean Herb mix 1/4 cup "Sodom and Gomorrah" Salt-Garlic-Sesame Seed Spice mix 4 stems of Rosemary stripped
I have a cooler that i use as a dedicated brine pan. they also make food safe brining bags, or a VERY LARGE stock pot will work. What ever size you need to get the bird totally submersed.
Start with a totally thawed bird. You should make sure all the stuffing bits are removed and the cavities are empty.
Next, boil the water, add the salt and be sure that all has dissolved. Remove from the heat. Add the remaining ingredients and mix. Put the bird in the brining vessel, pour the brine into the vessel and be sure you have enough to cover. Add more water if needed.
I brine turkeys overnight, up to 16 hours. When you remove the bird, be sure to rinse several times before roasting.
I am sorry I don't have a photo of the whole bird, but it was BEAUTIFUL! Just the right look of crispy burgundy hue. But the taste was the winner. The seasonings were perfect and most important, the juices from the bird were locked in. No over cooked, over done, over dry bird for me!
Thanksgiving has come and gone. Visiting family, if not gone yet will probably be heading out this morning. All that remains is the memories and hopefully a refrigerator full of leftovers!
This year, I was under strict orders to not experiment. The classics, turkey, dressing, simple vegetables, sweet potatoes and MASHED POTATOES.
Well, I brined the turkey in Pomegranate Juice (an experiment)
I baked a Chorizo Sausage dressing (an experiment)
I Sauteed Sweet Corn in butter with Cajun spices (I've made it before, but not simple vegetables)
I roasted Sweet Potatoes in a Tajine with apples and carrots in a brown sugar/maple syrup sauce (an experiment)
But... My mashed potato recipe is perfect in every way! Sweet, creamy, with just the right amount of lumps, nicely seasoned with garlic and a touch of salt and pepper and esthetically pleasing with wisps of red potato peel throughout.
This is the classic, not to be experimented on!
Here's Tip #1... Buttermilk AND Heavy Cream
Here's Tip #2... Russet Potatoes AND Red Potatoes
Here's Tip #3... Garlic, smashed and diced teeny, tiny
Here's why #1... Buttermilk has a tang and heavy cream certainly adds a thickness and richness that milk can not duplicate. Best of both worlds.
Here's why #2...Russet potatoes will be slightly lumpy unless you just beat the heck out of them. Red potatoes are perfect to get creamy potatoes. A little of each gives you nice creamy potatoes with just a hint of lumps. Also, peel the russet potatoes (brown does not add much aesthetics. But, leave the peel on the red potatoes. When they are smashed, little ribbons of red throughout will add a bit of color.
Here's why #3...And garlic should be there, but not in a size that you get a bite of garlic. Taking the flat of a chef's knife and smashing a clove, then dicing as small as possible will give you that size.
Creamy, just a bit of lumps and a hint of garlic.
Here's my recipe (adapted from one by Alton brown)...
3 pounds Red Potatoes 3 pounds Russet Potatoes 2 tsp Kosher Salt
3/4 cup Buttermilk
1/2 cup Heavy Cream
8 cloves Garlic (peeled and smashed)
Fresh ground Pepper to taste
Place all spud hunks in a 4 quart saucepan and add just enough cold water to cover. Add 1 tsp salt to the pot, cover and bring to a boil over high heat.
Meanwhile, combine the buttermilk, cream and garlic to a 2 quart saucepan and bring to simmer over low heat. Watch to make sure the mixture does not boil over. Stir occasionally.
When the spud water boils, ditch the lid, drop the heat to simmer and cook until the taters are easily crushed with tongs. Drain the potatoes well. The less moisture, the better.
Add the final teaspoon of salt, add 1/4 of the buttermilk mixture and start smashing.
As the spuds break down, add more of the buttermilk mixture. Remember these are smashed potatoes, not whipped potatoes. The red potatoes will mash well, the russet potatoes will mash slightly, but also some will remain whole, leaving a nice mixture of creamy potatoes with firm hunks floating. Mash to your desired results.
Try 'em this way, you'll never need to experiment on a classic!
Well, Jackie and I, the famous empty nester's are entertaining this week. It's been awhile since we have had kids in the house, and even longer since they left me in charge.
Aunt Jackie and her favorite Niece went Black Friday shopping (really, is this what the world has come to??? But I digress). Our favorite nephew-in-law, a plumber by trade, was fixing a broken toilet (less details the better). So, wacky Uncle Dave got to spend the morning with Megan, Melanie and Matt (ages 7,6 and 4... and boy, is he ever 4).
As to the details on the cake, it's a box. I used a Lemon box mix, one of those that has pudding all mixed in. The icing is scratch (and one of the best ever), an orange buttercream...
2 cups powdered sugar 1 stick of butter, softened 2 TBS orange juice the zest of 1 orange
The crazy look comes from using those new gel food colorings. Don't be shy, use enough to get the bright almost neon looking colors. The box I have only has 4 colors (red, yellow, blue and green). The other colors were made from mixing different combinations. Worked great (except the brown was supposed to be purple)...
It was very easy, just took a little time (which was the goal). And, it was great fun.
Here's what the kids did...
We always start by washing our hands...
Mat did the mixing...
Then we divided the batter into 8 Mis en Place bowls and added the color gel. Mix well.
And then just drop spoonfuls of each color into two greased pans. Once the batter is dropped, be careful to not mix. The colors did not mix, creating the wacky look.
While the cake was baking (see the box for directions), we learned about the cooks reward...
Licking the spoons!
Also, while it was baking, we mixed the icing and then cleaned the dishes so Aunt Jackie could really enjoy the cake.
A work of art!
And Aunt Jackie didn't have any idea what it would look like inside...
Stuffing a turkey is bad. There is a risk of killing your family with food poisoning. While selectively, on the surface, not a bad idea, but food poisoning is not selective. Everyone goes. BTW, the risk is small, but it is there. But, more important (well, not really important, but more likely), you run the more real risk of overcooking your turkey in order to get the stuffing hot enough. Your bird will cook faster and more evenly if you leave the cavity empty.
So, why not a cast iron skillet recipe.
One pot (well skillet), cook, mix and serve all in the same skillet.
By cooking in a large oping skillet, you get the benefits of a big amount of crispy top, covering an equal amount of the creamy melt in your mouth savory bread pudding custard base. Everyone gets that wonderful contrasting texture in each spoon full.
And a side benefit, it adds a beautiful color to your buffet table. the Chorizo sausage has a beautiful red color that will infuse into the other ingredients, adding a golden amber color to the dish.
Now really... Isn't that better looking than a brown mushy stuffing.
Oh, one more thing to consider... OMG taste!!!
Chorizo sausage is a spicy Spanish mix of pork, peppers, paprika (lots of paprika) and other spices. It adds a just spicy enough taste to the dressing without being overpowering. Since it is nicely spiced, no need to add a lot of other spices to the dish. It does not have that sage taste that is in most stuffing, but then again, most stuffings do not have the Chorizo taste you find in this dressing! But if you really think you will miss it, you have my permission to add some sage to the recipe. I also did not use celery. Personal preference only, feel free.
OK, here's what I did...
1 loaf of bread cut into 1 inch cubes (or a bag of bread cubes)
8 TBS butter, divided
1 pound fresh Chorizo sausage
1 medium onion, chopped
2 Granny Smith apples cored, and sliced
1/2 tsp kosher salt
3 cups chicken broth 1 cup Buttermilk 1/4 cup chopped fresh flat-leaf parsley 1/2 cup walnut pieces 4 eggs, beaten
Preheat the oven to 325 degrees.
Break out the large heavy cast iron skillet. You will be cooking on the stove top as well as baking in the oven. Or, when it comes time to mix, you can transfer into a baking dish.
Melt 4 TBS butter
Brown the sausage in the butter. DO NOT over cook the sausage. You just want to take the chill out and slightly color the outside.
Add the onion to the sausage and sautee for about 10 minutes
Add the apple slices and sautee for another 5 minutes. If you like celery, add now as well.
Add the broth and bring everything to a boil.
Remove from the heat and allow to cool for 10 minutes.
Top with bread cubes, add 1/2 of the parsley and sprinkle with 1/2 the walnuts (do not mix yet)
Drizzle the buttermilk and 4 beaten eggs over the bread, as evenly as possible
And finally, fold the bread mixture into the sausage mixture and mix gently. You want an even mix, but you do not want to over mix the bread cubes into bread crumbs.
Move the skillet to the oven, 325 degrees for 40 minutes. You will see the bread cubes just start to brown. Now, drizzle evenly the remaining 4 TBS of butter over the top and add the final bits of parsley and walnuts.
Return to the oven and finish browning the bread, about 20 minutes more.
Here are a few photos to give you an idea about what I am talking about...
I can't tell you how this tastes yet, as it won't be sliced till after dinner. But, I sure do like the looks of this pie...
GBD... Golden Brown and probably Delicious!
But how can you not love the cut out of the star of the Thanksgiving dinner, immortalized in pie shell dough.
Actually, I owe a couple of thanks for this. Both the thanks go out to one of my favorite blogs, The Mystery Lover's Kitchenand to one of their contributors.
I've written of them before, 6 merry murderesses who delight in food and murder mysteries. Always a good read. But last week they were giving Thanksgiving recipes.
Krista Davis, author of the Domestic Diva Mysteries Series posted this recipe for Pecan Pie. But, there are a couple twists and turns (red herrings if you will) in the recipe to make this pie stand out from the rest.
BTW, Krista has a new book arriving in the stores on December 7th.
The Diva Cooks a Goose, features recipes and a Christmas themed murder (in-laws and their "surprise" girlfriends... who doesn't ponder murder at this most glorious time of year).
But I digress... My second thanks also go out to Krista. On The Mystery Lover's Kitchenblog, Krista is having a weekly feature of making other blogger's favorite Christmas cookies. I was thrilled when she chose my pecan lace cookies as her first post in the series (and even more thrilled... actually relieved when hers came out so well). The prize, in addition to the honor was a set of cookie cutters. Including this turkey!
So, great recipe and I wanted to show off my new toy...
Here's what I did...
First Murder Bourbon Pecan Pie
3 tablespoons butter 1/2 teaspoon instant coffee (Sophie uses Sanka) 1 tablespoon unsweetened cocoa powder 3 tablespoons bourbon (airline size bottle holds about 4 tablespoons) 2 eggs 1/2 cup dark brown sugar 3/4 cup dark corn syrup 1/2 teaspoon salt 1 teaspoon vanilla 2 cups roughly chopped pecans 1 unbaked 9-inch pie shell Preheat the oven to 300 degrees. Microwave the butter for about 30 seconds and set aside to cool. In a cup, stir together the instant coffee, cocoa powder, and bourbon until the coffee crystals and cocoa powder are dissolved. Beat the two eggs in a mixer. Add the brown sugar and cooled butter and beat. Add the corn syrup, salt, and vanilla. Beat to combine all the ingredients. Mix in the pecans. Pour into pie shell and bake 55 to 60 minutes
Did you notice the instant coffee in the recipe. Can't wait to see how this tastes!
In order to get the turkey look, all I did was roll out the dough a little larger, folded some over in a little decorative border. I used a second sheet of pastry to cut out the turkeys. I used an egg wash to make them stick.
Here's a few photos to give you a better idea...
Thanks Krista, for the recipe and the cutters!
And my friends, I wish that your Thanksgiving offerings to the family table all look this good, and most important, taste just as good as I imagine this will
Happy Thanksgiving
And lest we forget...
Thanksgiving has a complicated origin in the United States. Only occasionally were there presidential proclamations of a national day of thanks prior to the American Civil War. In 1863, President Lincoln proclaimed a national Thanksgiving day. Since that day, Thanksgiving has been observed annually. Likewise, only a month before the attack on Pearl Harbor, in 1941, Thanksgiving became a federal holiday. It is not acoincidencethat this most "family" centric of all our holidays has it's origins when we were asking our best and bravest to sacrifice to the fullest measure of devotion. Enjoy your day with your family, make all your friends welcome in your home, and consider for a moment (dare I be politically incorect and ask you to pray for) the people in harm's way who earn our thanks every day. ...
It was a WONDERFUL day when I was selected as one of one hundred bloggers, home cooks and enthusiasts to host a Pom Dinner Party. Armed with a large box of goodies, as well as over 40 fresh Pom Wonderful variety of Pomegranates, I spent hours plotting, planning, arranging, cooking and most of all, enjoying the experience.
I had three goals for the Pom Dinner Party experience...
1. Best incorporation of pomegranates into the menu/drinks
2. Most inspired pomegranate decor
3. Most successful "How to Open a Pomegranate" presentation
Let's see how I did...
In reverse order, I got very good at opening a Pomegranate.
I made my very first video showing how to open a pomegranate - neatly. So neatly, I opened mine over a white towel. It can be done, no need to make your kitchen, counter top, clothes or sometimes ceilings look like you were slaughtering a dog. The day of the party, I took a few moments to demonstrate, and then had one of my party guests, Sharmin from WHAT YOU'RE MISSING KC open her very first pomegranate. Just a few drops of the juice escaped. A GREAT job!
My video is on Youtube...
I liked the idea of using the Beatles song, "HELP!" as the background music for the video. I uploaded a version of the video without music that you can find by clicking HERE.
I also made a Flickr folder with several photos showing the details of how to open a Pomegranate... NEATLY! Click HERE to find this Flickr folder.
------------ ------------
Assignment #2 for the party was to set the theme for a Pom Dinner Party by decorating with Pomegranates. Pom Wonderful generously supplied an abundance of Pomegranates to make this easy. I used about a half dozen of the pomegranates for the meal. The rest of the nearly 3 dozen pomegranates were used in the decorating frenzy!
And, when we ran out of real Pomegranates, we improvised.
One of my favorite touches was to set up a series of luminary bags outside. Spaced out a couple of feet apart up our driveway, along our steps and the front stoop, these red bags, with a silhouette of a Pomegranate on the outside of the bag, set the mood. Fill with a little kitty litter, light a candle and the entrance glowed!
But we didn't stop there...
Our fireplace is a fun place to highlight Pomegranates. Candles everywhere! Including inside of the fireplace. A few fall leaves and candlesticks to raise the candles and fruit to different levels made a nice display.
But wait, there is more to a fireplace.
The mantle is a great surface to continue the theme of candles and candlesticks. Different heights showed the beauty of the color and the unique look of the fruit.
But we didn't stop there...
We have a side table. No flat surface was safe. Still more candles, more fall foliage and shiny pomegranates!
And finally (for the front room)...
We have an antique ice box (our liquor cabinet). Or, for this day, yet another flat surface. More candles, more foliage and more candlesticks to raise a few Pomegranates for varied heights.
All of these decorations created a wonderful ambiance for a welcoming glass of a Pomegranate Champagne cocktail when our guests arrived (but more on that when we cover the food).
But the decorating was not done, as we set the table with a center runner of more fall foliage, more candles and Pomegranates. This time, we set the pomegranates in flower pots so that we could raise the height.
We even made use of the lid from one of the cases of Pomegranates sent by Pom Wonderful.
Colorful graphics on the lid with faux woodgrain made the lid an ideal backdrop to the meal.
I uploaded all of the photos I took of the decorations to Flickr. You can see them all as a set by clicking HERE.
------------ ------------
And finally... the food. Ultimately, a dinner party rises and falls on the food.
I took this opportunity to explore sauces. I read about "mother sauces," small sauces and second sauces that are created from the mother bases. I served my meal in courses. In this way, the different ways of using Pom Wonderful pomegranate juice to flavor a sauce or to flavor a dish would be easier to taste.
So, if you are going to serve in courses, serve a 7 course meal. It just says "Elegant Dinner Party."
And, if you are going to explore sauces, plan a meal that features seven DIFFERENT sauces.
7 sauces for 7 courses
Before the meal, we shared a drink...
#1#1#1#1#1#1#1#1#1#1#1#1#1#1#1#1#1#1#1#1
My first sauce was to make my own Grenadine, that sweet, bright-colored flavoring accent used in many tropical cocktails. Sadly, the commercial brands of grenadine have evolved to be mostly high fructose corn syrup. But the good news, the "real" recipe of pomegranate juice, cherry, sugar and a bit of vodka is easy to do. I made a blog post that features recipes for making your own Grenadine, as well as recipes for...
I also shared a secret to make drinks just a little more festive.
I froze some Pom Wonderful pomegranate juice in ice cube trays. This made making the Shirley Temples and the Pomegranate Manhattans incredibly easy, yet with the appearance of something very special.
I also froze orange juice for the tequila sunrise drink. But I floated pomegranate Arils in the cubes. Again, very easy, and added to the festivities of the evening.
I used the Grenadine to flavor the surprise center of Sweetened Ricotta Cheese(click the blue letters to get to the blog post with the recipe) inside the mozzarella cheese ball I served for a Caprise Salad. Just a bit complicated, but the post explains it all.
#2#2#2#2#2#2#2#2#2#2#2#2#2#2#2#2#2#2#2#2
The second sauce I made was a Pomegranate Molasses. Similar to Grenadine (same ingredients), but the cooking process makes it a different sauce. Thicker (like honey), not as sweet, more of the tartness from the pomegranate and perfect as a sugar substitute in many dishes.
I used the molasses to make Anadama Bread (click the blue letters to get to the blog post with the recipe).
I also used the Pomegranate molasses as a drizzle for a New York style Cheesecake(click the blue letters to get to the blog post with the recipe).
For the dinner party, in addition to the bread, I used the pomegranate molasses as a flavoring for Sweet Potato Grits! Click the blue letters to get to the blog post with the recipe.
#3#3#3#3#3#3#3#3#3#3#3#3#3#3#3#3#3#3#3#3
The third sauce I made was a Garlic Infused BBQ Sauce. With tiny pieces of minced garlic, as well as garlic juice, this made a wonderful accent sauce. The garlic powers the sauce, but the sweet/tart taste of the Pom Wonderful also left a distinctive taste.
The Pomegranate Garlic Sauce was used to flavor a delightful Olive Tapinade I used to fill a buttery soft Tapinade Straw(click the blue letters to get to the blog post with the recipe). This was my appetizer course (the first dish served, after the drinks). I also served a few Pomegranate Arils and a shot of pure Pomegranate juice so that my guests would know what tastes to look for throughout the evening.
I used the Pomegranate Garlic Sauce as a drizzle to accent the flavors of a Creole Artichoke and Shrimp Soup(click the blue letters to get to the blog post with the recipe).
#4#4#4#4#4#4#4#4#4#4#4#4#4#4#4#4#4#4#4#4
The fourth sauce I made was a pomegranate-balsamic vinegar reduction. I loved the taste of this sauce, and would use this in any recipe that calls for balsamic vinegar. By making a reduction, the flavors are heightened. The tang of the pomegranate juice and the crispness of the balsamic made this a perfect sauce!
I used the pom-balsamic reduction as the dressing drizzle on the salad course, an Insalata Caprese Tomato and Mozzarella(with a surprise center) Salad I served for the salad course. Click the blue letters to get to the blog post with the recipe
#5#5#5#5#5#5#5#5#5#5#5#5#5#5#5#5#5#5#5#5
The fifth sauce I made was a Persian Pomegranate Sharbat Sauce.A sharbat sauce is an ancient sweet dessert drink. When frozen, it makes a fruit sherbet without adding dairy.
I used the Persian Pomegranate Sharbat Sauce to make my palette cleanser course of a Pomegranate Sorbet(click the blue letters to get to the blog post with the recipe).
#6#6#6#6#6#6#6#6#6#6#6#6#6#6#6#6#6#6#6#6
The next sauce I USED (notice I didn't say made) is a bit of a cheat, as I in fact did not make it. I used some of the Pom Wonderful Pomegranate Juice straight.
I used the Pom Wonderful Juice to make a specialty of mine, the fish course of Pomegranate Court Bouillon. A Cajun dish that guarantees a moist tender piece of fish as you poach the fish in the pomegranate juice (click the blue letters to get to the blog post with the recipe)!
#6#6#6#6#6#6#6#6#6#6#6#6#6#6#6#6#6#6#6#6
OK, the REAL sauce #6 that I MADE was a Spicy Hot Pomegranate Chipotle Sauce. With my grilling background, this sauce is my favorite. I made a thick paste that I can easily use to thin for a mop sauce next time I make something in my smoker, or as a thin vinegar style finishing sauce, or use to make a thick BBQ sauce. Experienced grillers and fans of spicy foods know that your mouth has different taste buds that taste heat and sweet differently. The buds that like heat do not react to sweet flavors. And the buds that like sweet do not pay much attention to heat. Also, the sweet taste buds are in the front of your mouth, while the heat buds are primarily located in the back of your throat. By combining the sweet of the pomegranate juice and the heat of the chipotle peppers used in making this sauce, creates a party in your mouth, exciting all of your taste buds.
This sauce was used to flavor and glaze a Pork Wellington(click the blue letters to get to the blog post with the recipe)! It was, by far, the most complicated dish I made, but worth all the effort. Fork tender and filled with flavors of walnuts, spinach and the sauce, this dish is a winner!
And sure enough, I did indeed smoke a pork butt and used this as a mop and then a Carolina style finishing sauce for an incredible batch of Pomegranate Chipotle Pulled Pork. I made this last weekend, so it was not part of my Pom Dinner Party. But, one day soon, I will be making a blog post about this!
#7#7#7#7#7#7#7#7#7#7#7#7#7#7#7#7#7#7#7#7
And finally, what party would be complete without dessert? And what dessert would be complete without chocolate? My 7th and final sauce was a tangy Pomegranate Chocolate Ganache. The ganache is wonderful as is, a little thin but pour-able and melts in your mouth, or can be thickened to make an icing thickness that sticks and can be stuck to (you'll see what I mean).
The thin sauce was perfect to fill a chocolate cordial cup. I added a bit of white chocolate for contrast and accented with Pomegranate Arils to make a Pomegranate Chocolate Cordial. Click the blue letters to get to the blog post with the recipe.
I used a thicker version of the ganache as flavoring for my first ever attempt at Chocolate Pomegranate French Macarons. The combination of chocolate and the tang of the Pomegranate juice made a wonderful filling! Click the blue letters to get to the blog post with the recipe.
In addition to the links, on Flickr, I uploaded photos I took while I was cooking. Please click HERE to see the photos and read the captions of the experience
------------ ------------
After the dessert course, my Pom Wonderful dinner party was finished. It is very easy to accent any dish with pomegranate Arils, but truly, the secret to cooking is in the sauce (or sauces). There are dozens of possibilities. Almost any dish can be accented with the taste and health benefits of Pomegranates and Pom Wonderful Pomegranate juice.
I had the time of my life. I loved being able to experiment. My dinner party was an opportunity for me to host a Kansas City area Blogger get together. It was a great night of talking food and the KC foodie scene.
So, thanks Pom Wonderful... I already feel like a winner in every way.
But...
Readers, how do you think I did with the assigned goals...
1. Best incorporation of pomegranates into the menu/drinks
2. Most inspired pomegranate decor
3. Most successful "How to Open a Pomegranate" presentation
Ultimately, I will be judged against the other 99 party hosts.